
ThirstyAffiliates Pro can send affiliate link clicks to Google Analytics 4 (GA4) through Google Tag Manager (GTM). GTM is a free Google tool that manages tracking code on a website. This document explains how to set the “Tracking Script” option to “Google Tag Manager” and complete the required GTM configuration.
Selecting “Google Tag Manager” in ThirstyAffiliates is only the first step. The plugin reports each click to GTM. GTM then needs instructions on what to do with that click. Those instructions are created in later sections of this document.
After completing this document, each affiliate link click appears in GA4 as an event. The clicked link path is attached to that event.
Requirements
The following items are required before starting:
- ThirstyAffiliates and ThirstyAffiliates Pro installed and activated;
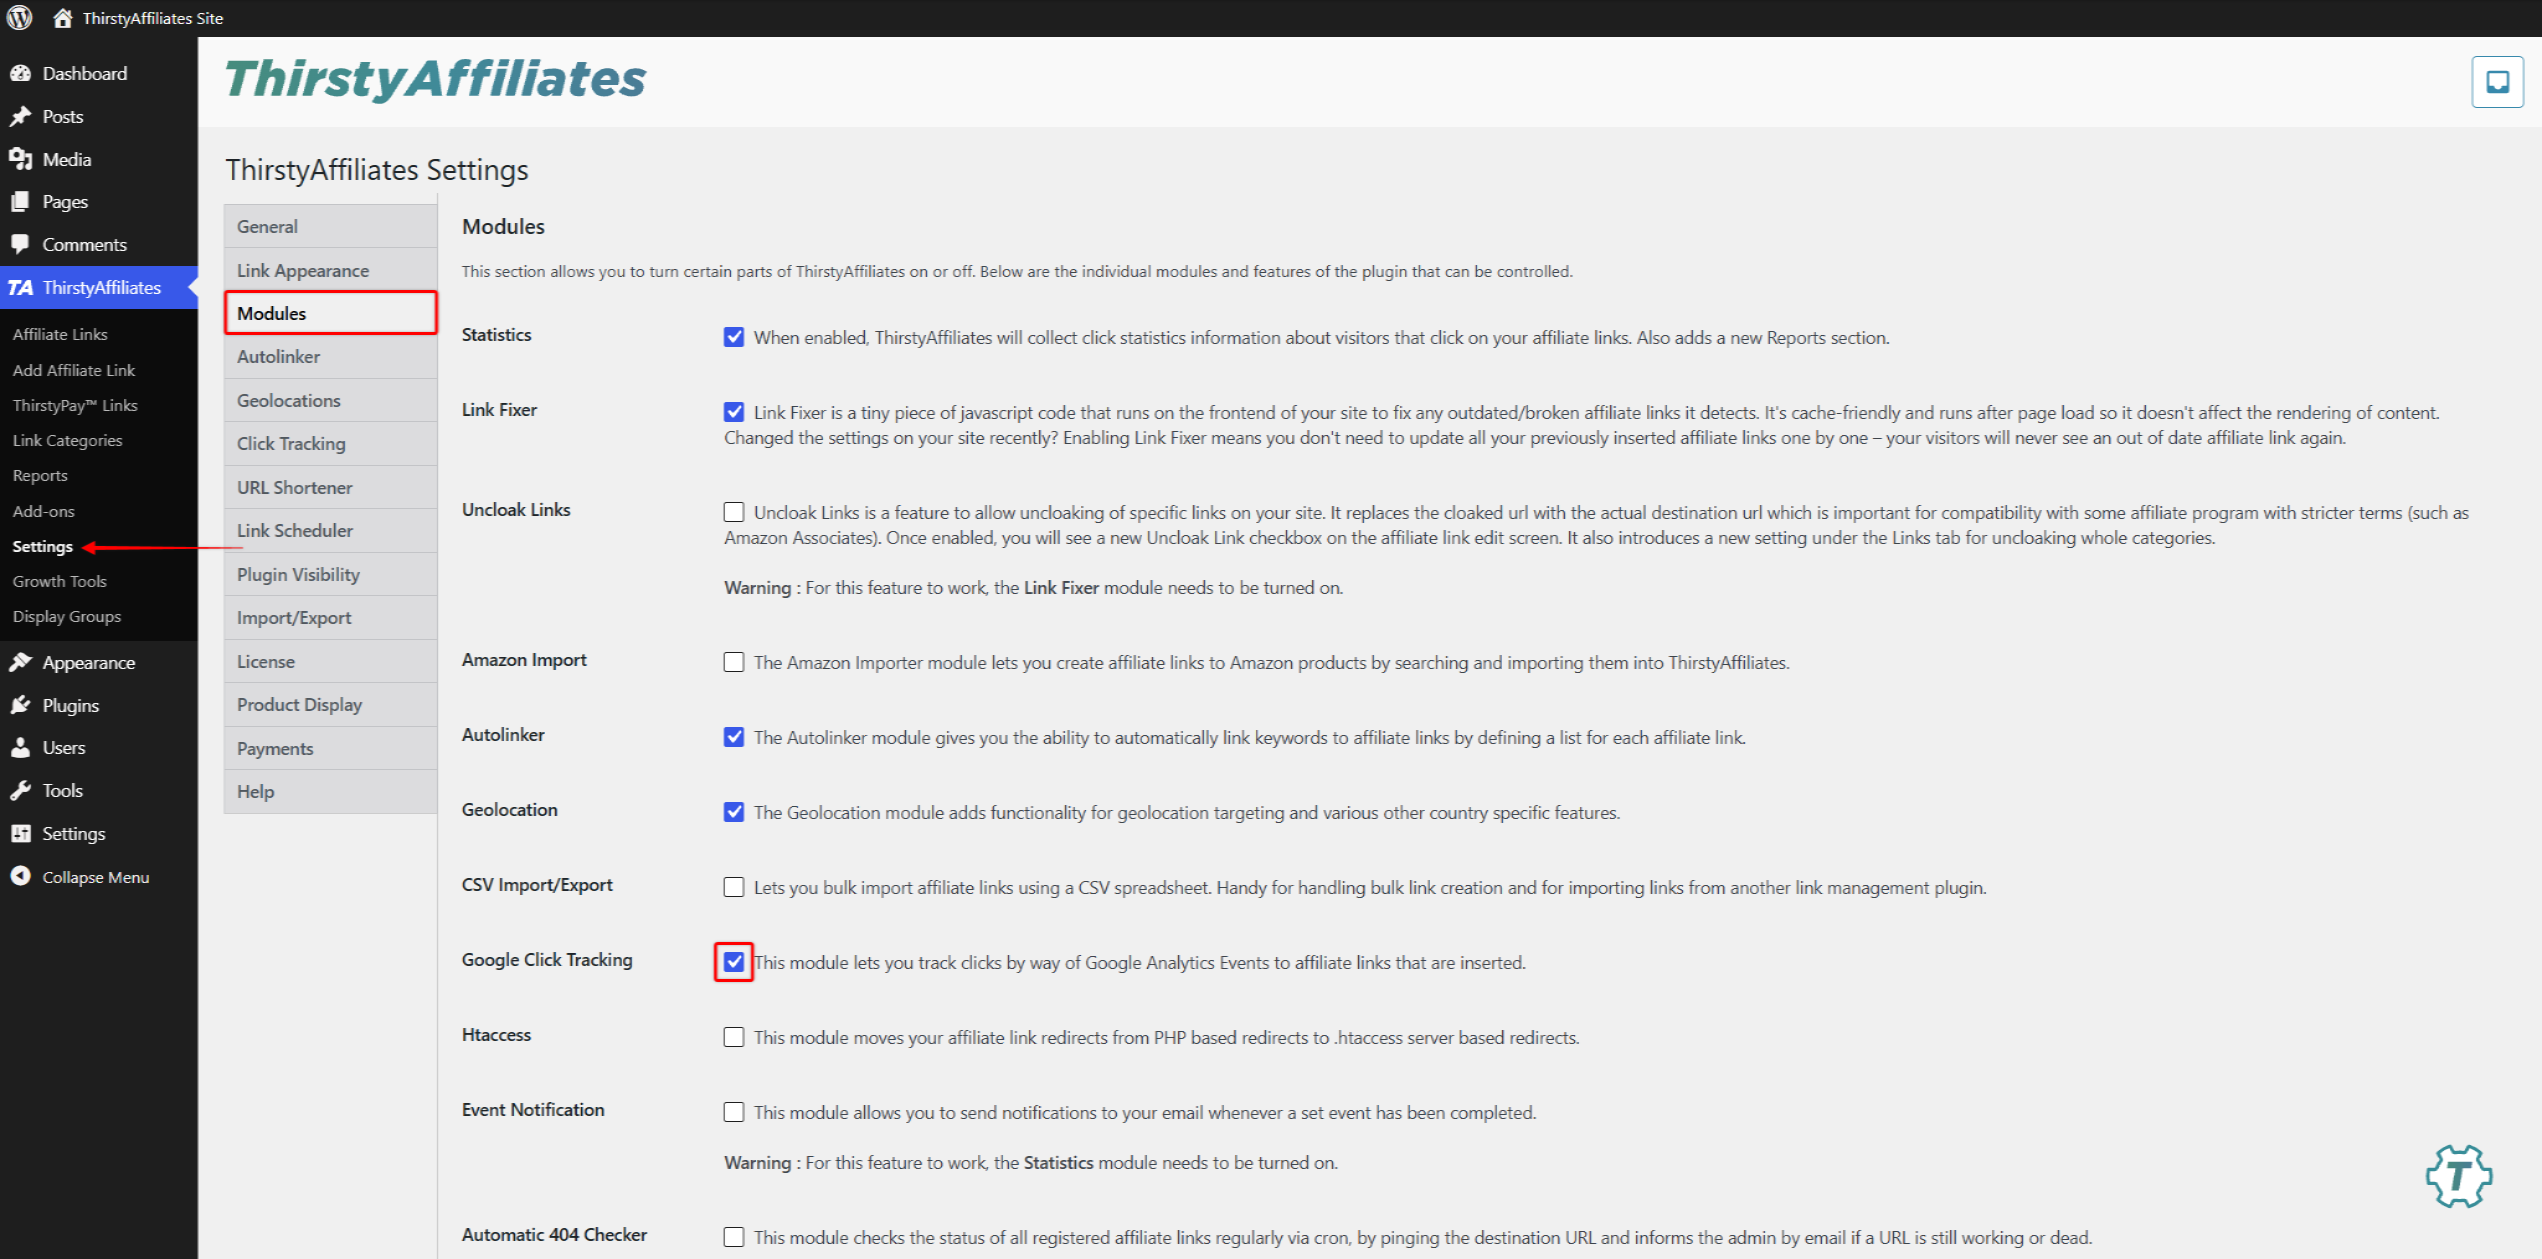
- the Google Click Tracking module enabled under WordPress Dashboard > ThirstyAffiliates > Settings > Modules;
- a Google Analytics 4 property for the site;
- a Google Tag Manager account with a container for the site;
- the GTM container code loading on every page of the site.
In Google Tag Manager, a container holds all tracking settings for one website. GTM provides a short code snippet for each container. That snippet must load on every page of the site. Without it, GTM never receives the clicks.
The simplest way to add the snippet is a WordPress plugin made for Google Tag Manager. Such plugins ask for the container ID and add the snippet automatically. Use only one method to add the snippet. Adding it twice causes duplicate events.
Two Google IDs appear in this document:
- the Measurement ID identifies the GA4 property. It starts with
G-, for exampleG-XXXXXXXXXX; - the container ID identifies the GTM container. It starts with
GTM-, for exampleGTM-XXXXXXX.
How the Google Tag Manager Option Works
When “Tracking Script” is set to “Google Tag Manager”, ThirstyAffiliates stops adding its own Google Analytics code to the site. Instead, on each affiliate link click, the plugin sends a small message to GTM. GTM calls this message a custom event.
The message holds two pieces of information:
- the event name, which is
Affiliate Linkby default. The “Custom event category name” setting changes this name; - a field named
link_urithat holds the clicked link. The “Event action value” setting controls what this field holds. The default is the link URI, such as/recommends/example-link/. This document uses the default. The other options are “Full link URL”, “Link slug (last segment of URL)”, and “Link text”.
Both names are typed into GTM in later steps. They must match exactly.
Users of the older Universal Analytics may expect event category, action, label, and value fields. GA4 uses an event name and parameters instead, so link_uri arrives as a parameter. The “Event action value” setting does not set a monetary value in GA4.
Setting the Tracking Script in ThirstyAffiliates
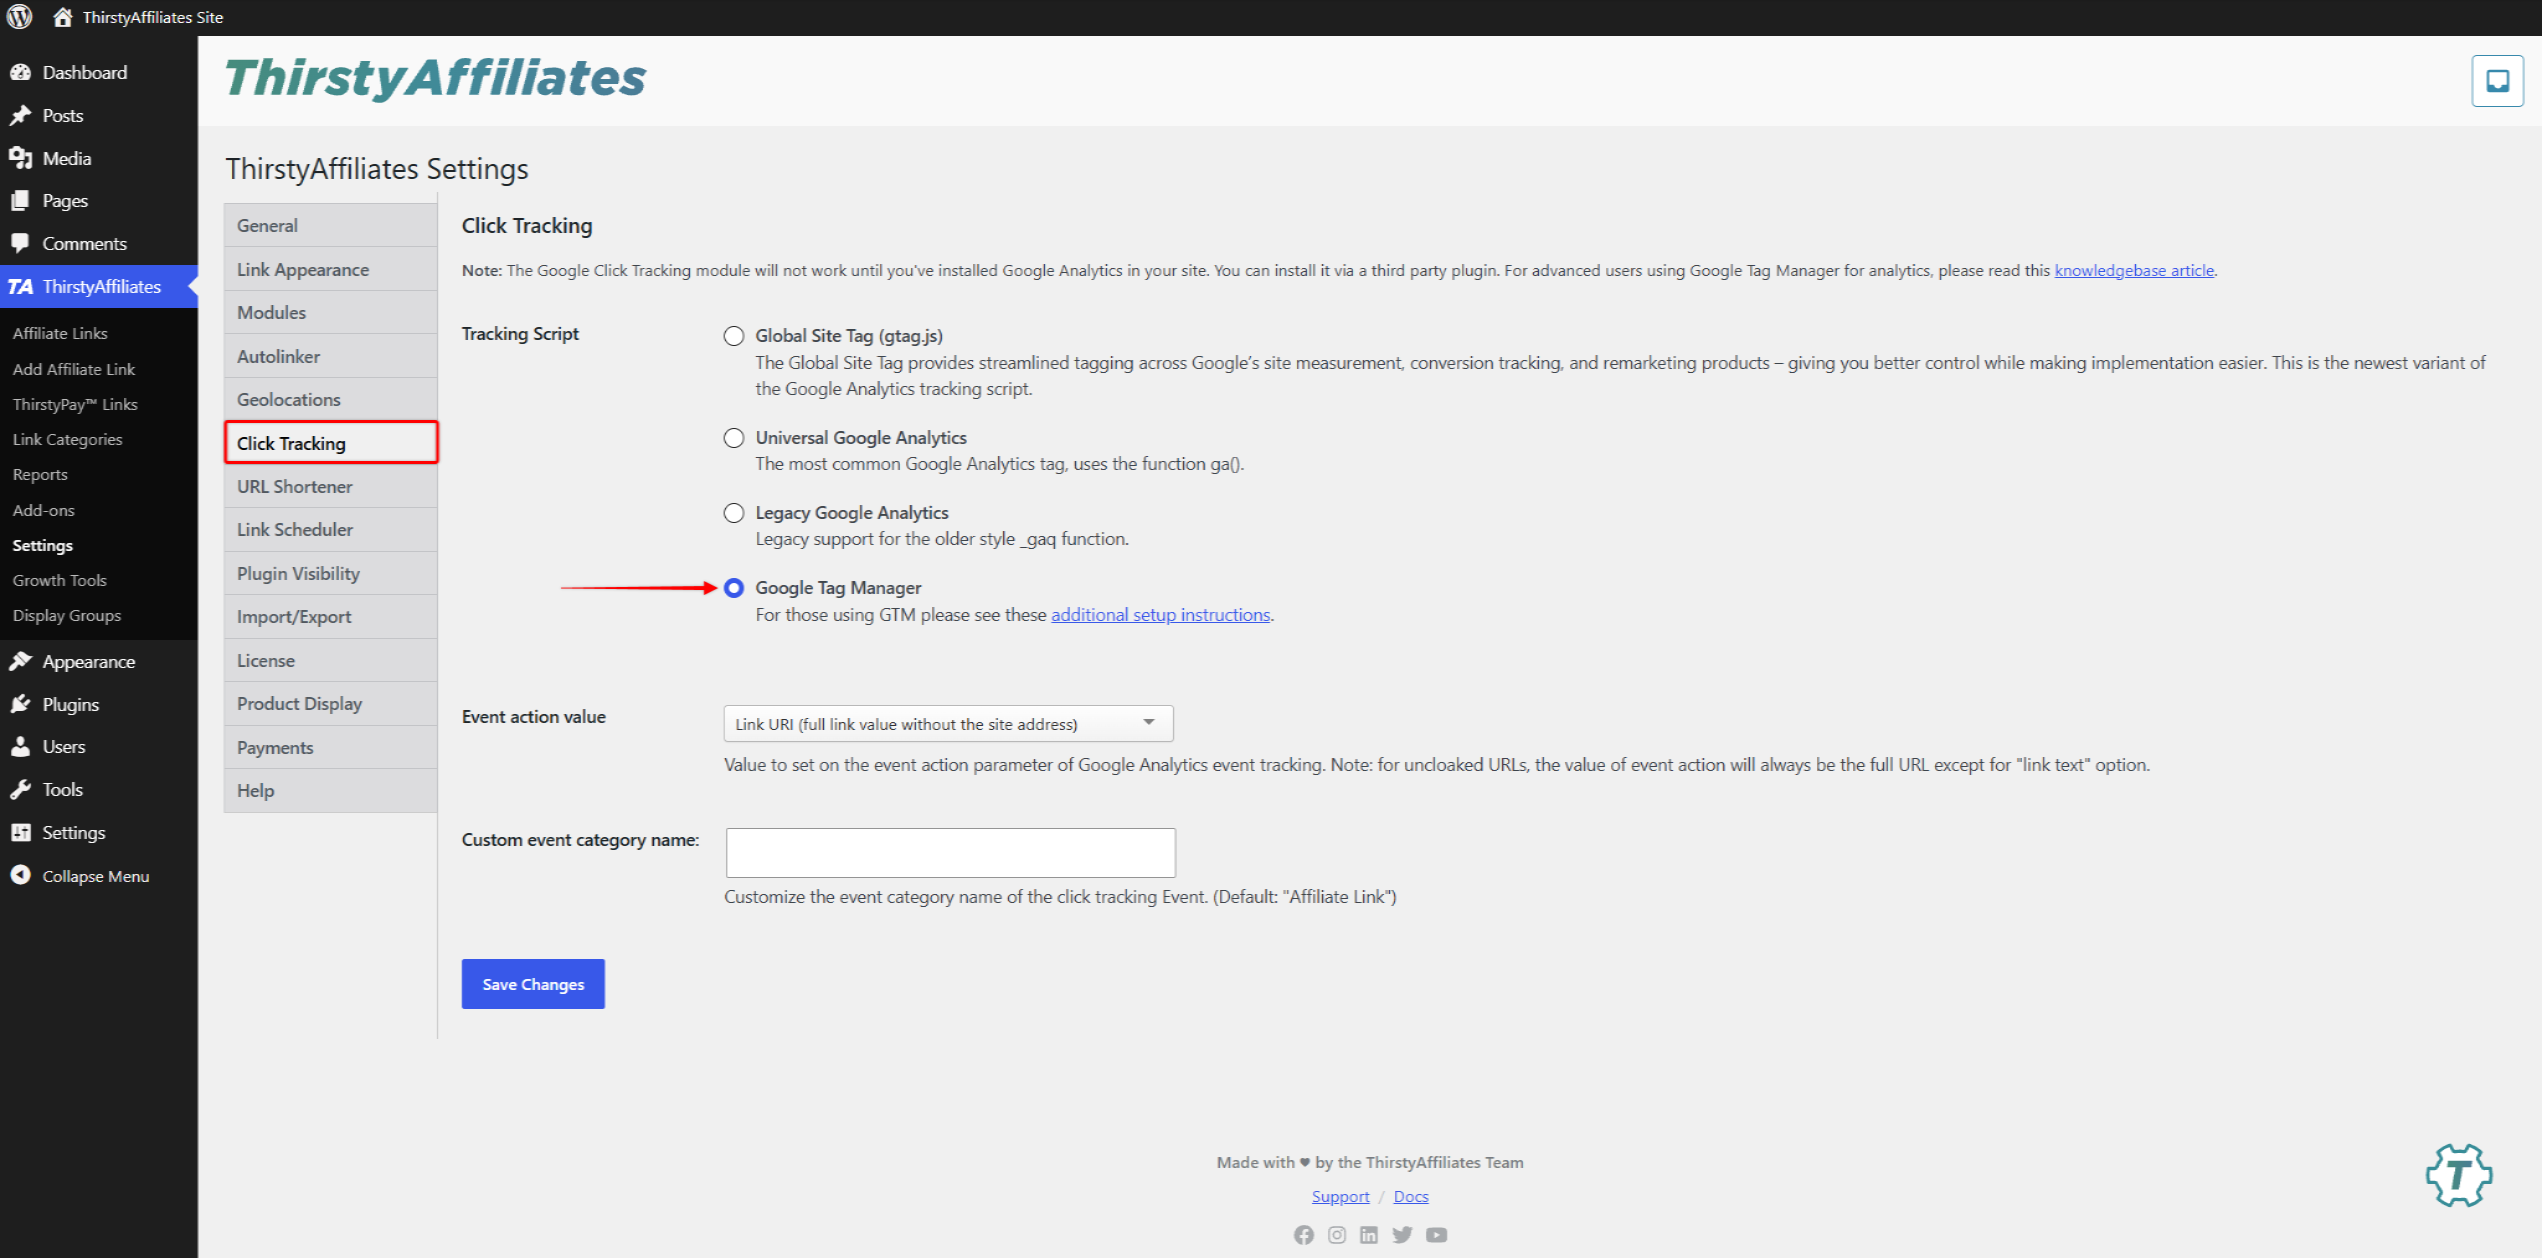
- Navigate to WordPress Dashboard > ThirstyAffiliates > Settings, and click the Click Tracking tab.
- Set “Tracking Script” to “Google Tag Manager”.
- Leave “Event action value” set to “Link URI (full link value without the site address)” unless another value is required.
- Leave “Custom event category name” empty unless a custom event name is required.
- Click Save Changes.
Changing the “Tracking Script” option changes the code that ThirstyAffiliates adds to every page. Many sites keep ready-made copies of their pages to load faster. This is called caching. Clear every cache after saving: the hosting cache, any CDN such as Cloudflare, and any WordPress caching plugin. Cached pages keep the old code, and clicks on those pages are never reported to GTM.
Configuring Google Tag Manager
The GTM configuration needs three items. A variable reads one piece of information from the click message. A trigger decides when GTM should act. A tag sends the data to Google Analytics. Create them in the order below.
The examples use the default event name Affiliate Link. If a custom event name was set in ThirstyAffiliates, use that exact name instead.
Creating the Data Layer Variable
This variable reads the link_uri value from the click message.
- Open the site container at Google Tag Manager, and navigate to Workspace > Variables.
- Under “User-Defined Variables”, click New.
- Click Variable Configuration, and select Data Layer Variable.
- In the “Data Layer Variable Name” field, enter
link_uri. - Leave the remaining options at their defaults.
- Name the variable
DLV - link_uriat the top of the panel, and click Save.
Creating the Custom Event Trigger
This trigger fires when ThirstyAffiliates reports a click.
- Navigate to Workspace > Triggers, and click New.
- Click Trigger Configuration, and select Custom Event.
- In the “Event name” field, enter
Affiliate Link. The value must match the ThirstyAffiliates event name exactly, including spaces and capitalization. - Under “This trigger fires on”, select All Custom Events.
- Name the trigger
CE - Affiliate Linkat the top of the panel, and click Save.
Creating the GA4 Event Tag
Two tags are involved. The Google tag connects the container to the GA4 property. The GA4 event tag sends the click to that property. If the container already has a Google tag for the Measurement ID, start from step 4.
- Navigate to Workspace > Tags, and click New.
- Click Tag Configuration, select Google Tag, and enter the Measurement ID in the “Tag ID” field.
- Set the trigger to Initialization – All Pages, name the tag, and click Save.
- Click New, click Tag Configuration, and select Google Analytics: GA4 Event.
- In the “Measurement ID” field, enter the Measurement ID. Do not enter the
GTM-container ID. - In the “Event Name” field, enter
affiliate_link. GA4 event names allow letters, numbers, and underscores only. - Expand Event Parameters, and click Add parameter.
- In the “Event Parameter” field, enter
link_uri. - In the “Value” field, click the variable icon, and select DLV – link_uri.
- In the “Event Parameter” field, enter
- Click Triggering, and select CE – Affiliate Link.
- Name the tag
GA4 - affiliate_linkat the top of the panel, and click Save.
Testing the Setup in Tag Assistant
GTM includes a testing tool called Tag Assistant. It shows what GTM does on the site before any change goes live. Test the configuration with it before publishing.
Use a page of the site that visitors can see and that contains a cloaked ThirstyAffiliates link. A cloaked link is an affiliate link that uses the site’s own address. Cloaked links start with the link prefix set under WordPress Dashboard > ThirstyAffiliates > Settings > Link Appearance.
- In the GTM workspace, click Preview.
- Enter the URL of the test page, and click Connect. The page opens in a new tab.
- Left-click the affiliate link on the test page. Opening the link through the right-click menu does not trigger the click event.
- Return to the Tag Assistant tab.
- At the top, select the GTM- container entry. Do not select the G- Google tag entry.
- In the left-hand event list, click Affiliate Link.
- Open the Tags tab, and confirm that GA4 – affiliate_link appears under “Tags Fired”.
- Open the Data Layer tab, and confirm that
link_uriholds the clicked link path.
If Tag Assistant cannot connect to the page, the GTM snippet is not loading on the site. Check the snippet installation before continuing.
Publishing the Container
Changes shown in Tag Assistant are not live yet. Publish the container once the test succeeds.
- Return to the GTM workspace, and click Submit.
- Enter a version name, such as
ThirstyAffiliates click tracking. - Click Publish.
Viewing Affiliate Link Clicks in Google Analytics
DebugView and Realtime are GA4 reports that show events within seconds. Standard GA4 reports can take a day to update. Use DebugView or Realtime to confirm that clicks arrive.
- Navigate to Google Analytics > Admin > DebugView. Alternatively, open Google Analytics > Reports > Realtime.
- Click an affiliate link on the site, and wait for the
affiliate_linkevent to appear. - Click the event, and open Parameters. The
link_uriparameter holds the clicked link path.
By default, standard GA4 reports show the event name only. The link path stays inside the event. To see it as a report column, register link_uri as an event-level custom dimension. Custom dimensions are created under Google Analytics > Admin > Data display > Custom definitions. GA4 can take up to 48 hours to show data for a new custom dimension.
Troubleshooting Missing Events
The Event Never Appears in Tag Assistant
ThirstyAffiliates did not report the click. Confirm that “Tracking Script” is set to “Google Tag Manager”. Confirm that the test link is a cloaked affiliate link using the current link prefix. Plain links that were not inserted through ThirstyAffiliates are not tracked. Also confirm that Tag Assistant connected to the page, which shows that the GTM snippet loads.
The Event Appears on Some Pages Only
Those pages are still served from cache with the old tracking code. Clear the cache for the whole site and test again.
The Tag Shows Under “Tags Not Fired”
The trigger “Event name” does not match the plugin event name. Compare both values character by character, including spaces and capitalization.
Traffic Is Counted Twice in GA4
Two Google tags send page views to the same Measurement ID. This happens when a plugin such as MonsterInsights already sends page views. Remove the duplicate Google tag from the GTM container, and keep the GA4 event tag. Sites that rely on MonsterInsights can use the MonsterInsights integration instead of GTM.