The Autolinker feature is available in ThirstyAffiliates Pro only.
It lets you set keywords and automatically link them up to your affiliate links in both your existing posts and any new post, without any intervention from you.
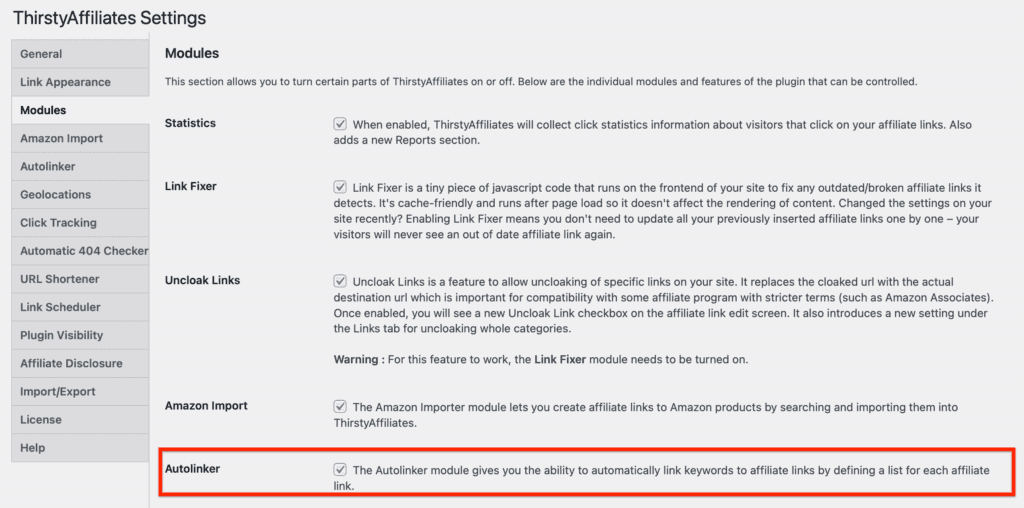
To use this feature, you need to enable it under ThirstyAffiliates->Settings->Modules:
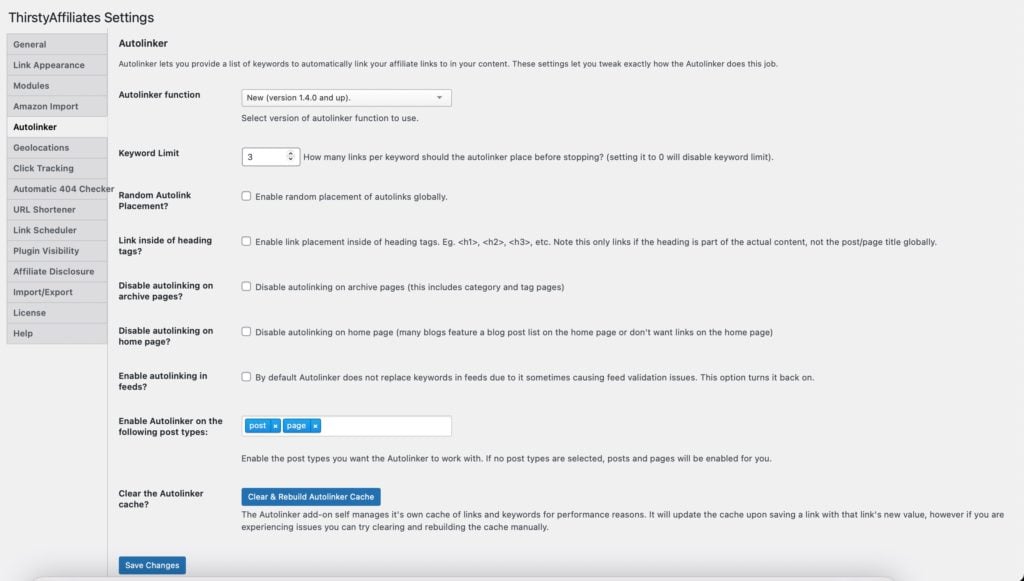
Once you enable the Autolinker module, the settings page will become available:
AUTOLINKER SETTINGS
Autolinker function: Select the version of autolinker function to use. Most users will be able to leave it at the New (version 1.4.0 and up), but if necessary, you can chose the Old version (below version 1.4.0)
Keyword Limit: The Autlinker keyword limit is to set how many links per keyword should the autolinker place before stopping. Setting it to 0 will disable the keyword limit. If you have two keywords and you set the keyword limit to 5, you'll have 10 autolink keywords in total for that post/page, because you have 2 keywords x 5 (your limit).
Random Autolink Placement? Enable this option if you want to have random placement of autolinks globally.
Link inside of heading tags? This option allows you to enable link placement inside of heading tags. Eg. <h1>, <h2>, <h3>, etc. Note: this only links if the heading is part of the actual content, not the post/page title globally.
Disable autolinking on archive pages: Choose if you want to disable autolinking on archive pages (this includes category and tag pages)
Disable autolinking on home page? Many blogs feature a blog post list on the home page or don't want links on the home page.
Enable autolinking in feeds? By default Autolinker does not replace keywords in feeds due to it sometimes causing feed validation issues. This option turns it back on.
Enable Autolinker on the following post types: Enable the post types you want the Autolinker to work with.
Clear the Autolinker cache? The Autolinker add-on self manages it's own cache of links and keywords for performance reasons. It will update the cache upon saving a link with that link's new value, however if you are experiencing issues you can try clearing and rebuilding the cache manually.
SETTING KEYWORDS FOR YOUR THIRSTYAFFILIATES LINK
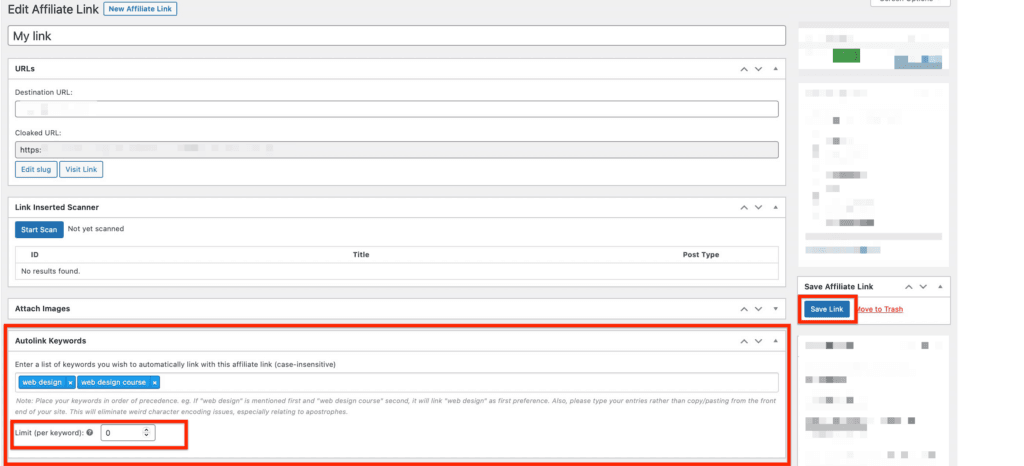
1. Go to ThirstyAffiliates->Affiliate links and choose the affiliate link to edit or create a new affiliate link.
2. Make sure to have the Autolink Keywords option enabled in the screen option as shown below:
3. Enter a list of keywords you wish to automatically link with this affiliate link (case-insensitive).
4. Make sure to place your keywords in order of precedence. Type your entries rather than copy/pasting from the front end of your site. This will eliminate weird character encoding issues, especially relating to apostrophes.
5. Set the limit per keyword and save your ThirstyAffiliates link.
6. Create a new post and/or page (or edit the existing one) and see your keywords in action: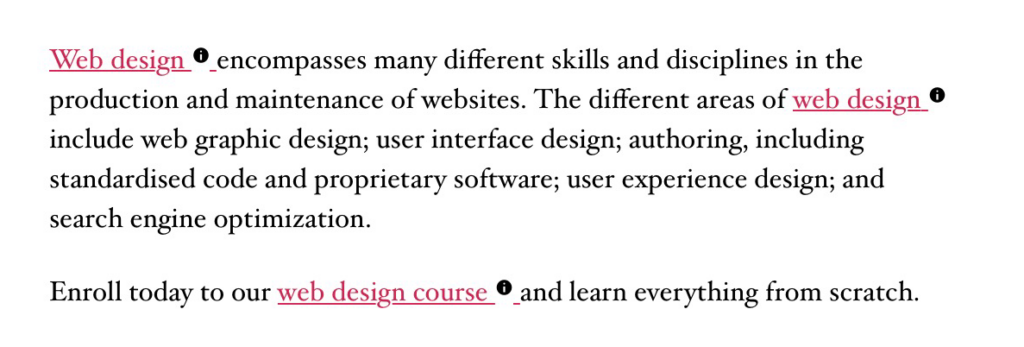
TROUBLESHOOTING
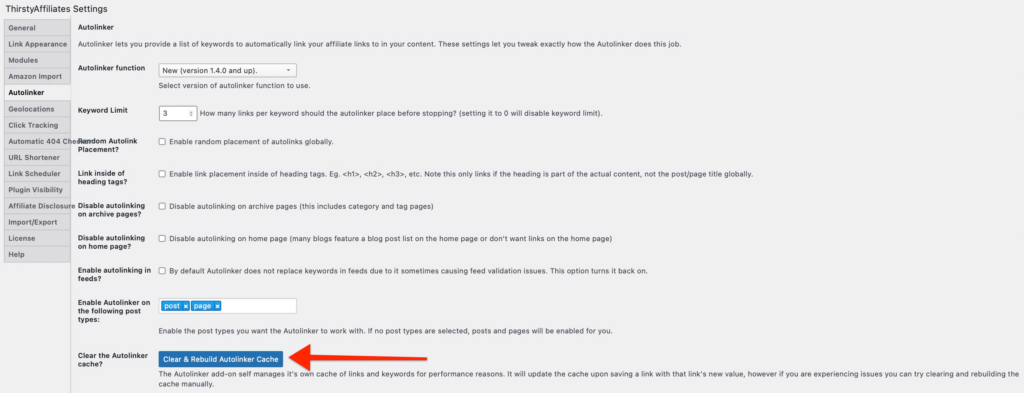
If for some reason your keywords aren't showing, try clearing and rebuilding the cache manually by hitting the Clear & Rebuild Autolinker Cache button:
If that doesn't help, please contact the support team

