In this guide, we'll introduce you to the ThirstyAffiliates plugin, focusing on the onboarding wizard which is essential for a seamless and effective affiliate marketing startup.
Learn how to navigate the initial setup process, activate key features, create your first ThirstyAffiliate link, and utilize the plugin for efficient affiliate link management.
Onboarding Wizard
First, you need to install and activate the ThirstyAffiliates Pro plugin or the ThirstyAffiliates free plugin on your site. After the plugin is activated, navigate the WordPress Dashboard > ThirstyAffiliates.
Here, the ThirstyAffiliates Onboarding Wizard will be ready to walk you through our 5-step setup process.
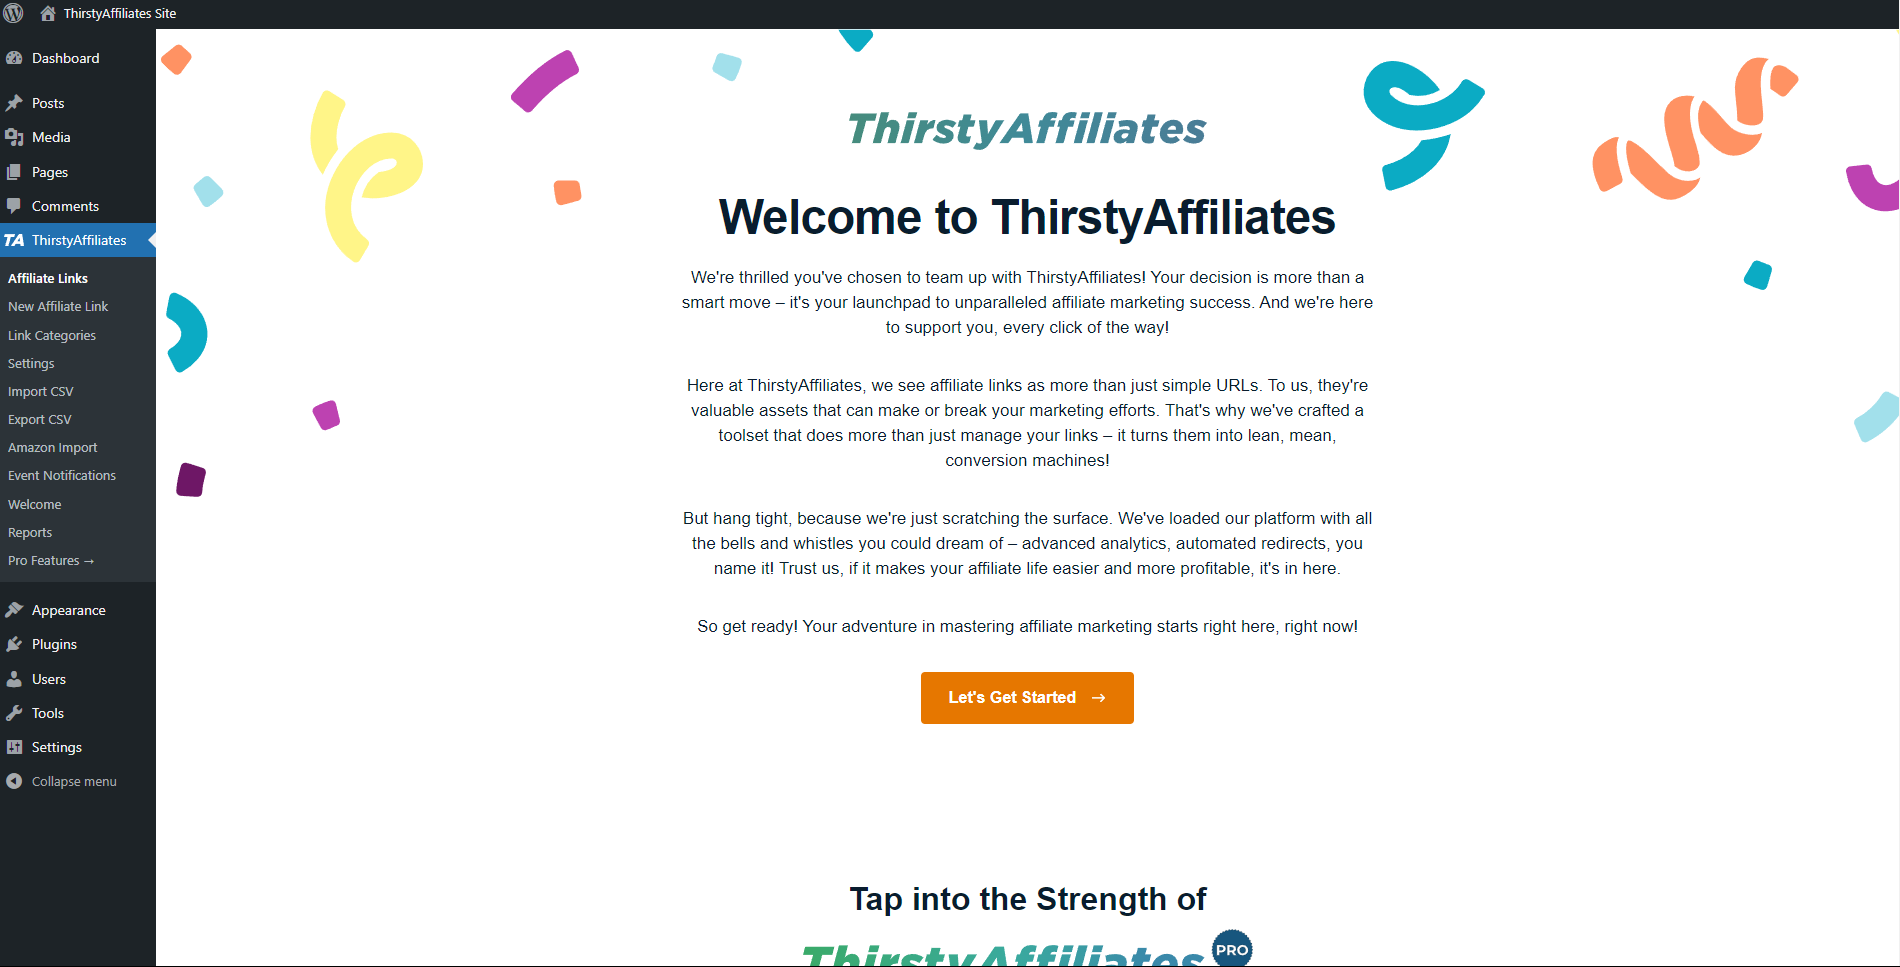
The wizard takes you through the following:
- Activate Your License
- Enable ThirstyAffiliates Features
- Create Your First Link
- Categorize Your Link
Click on the Get Started button to begin the wizard.
Activate Your License
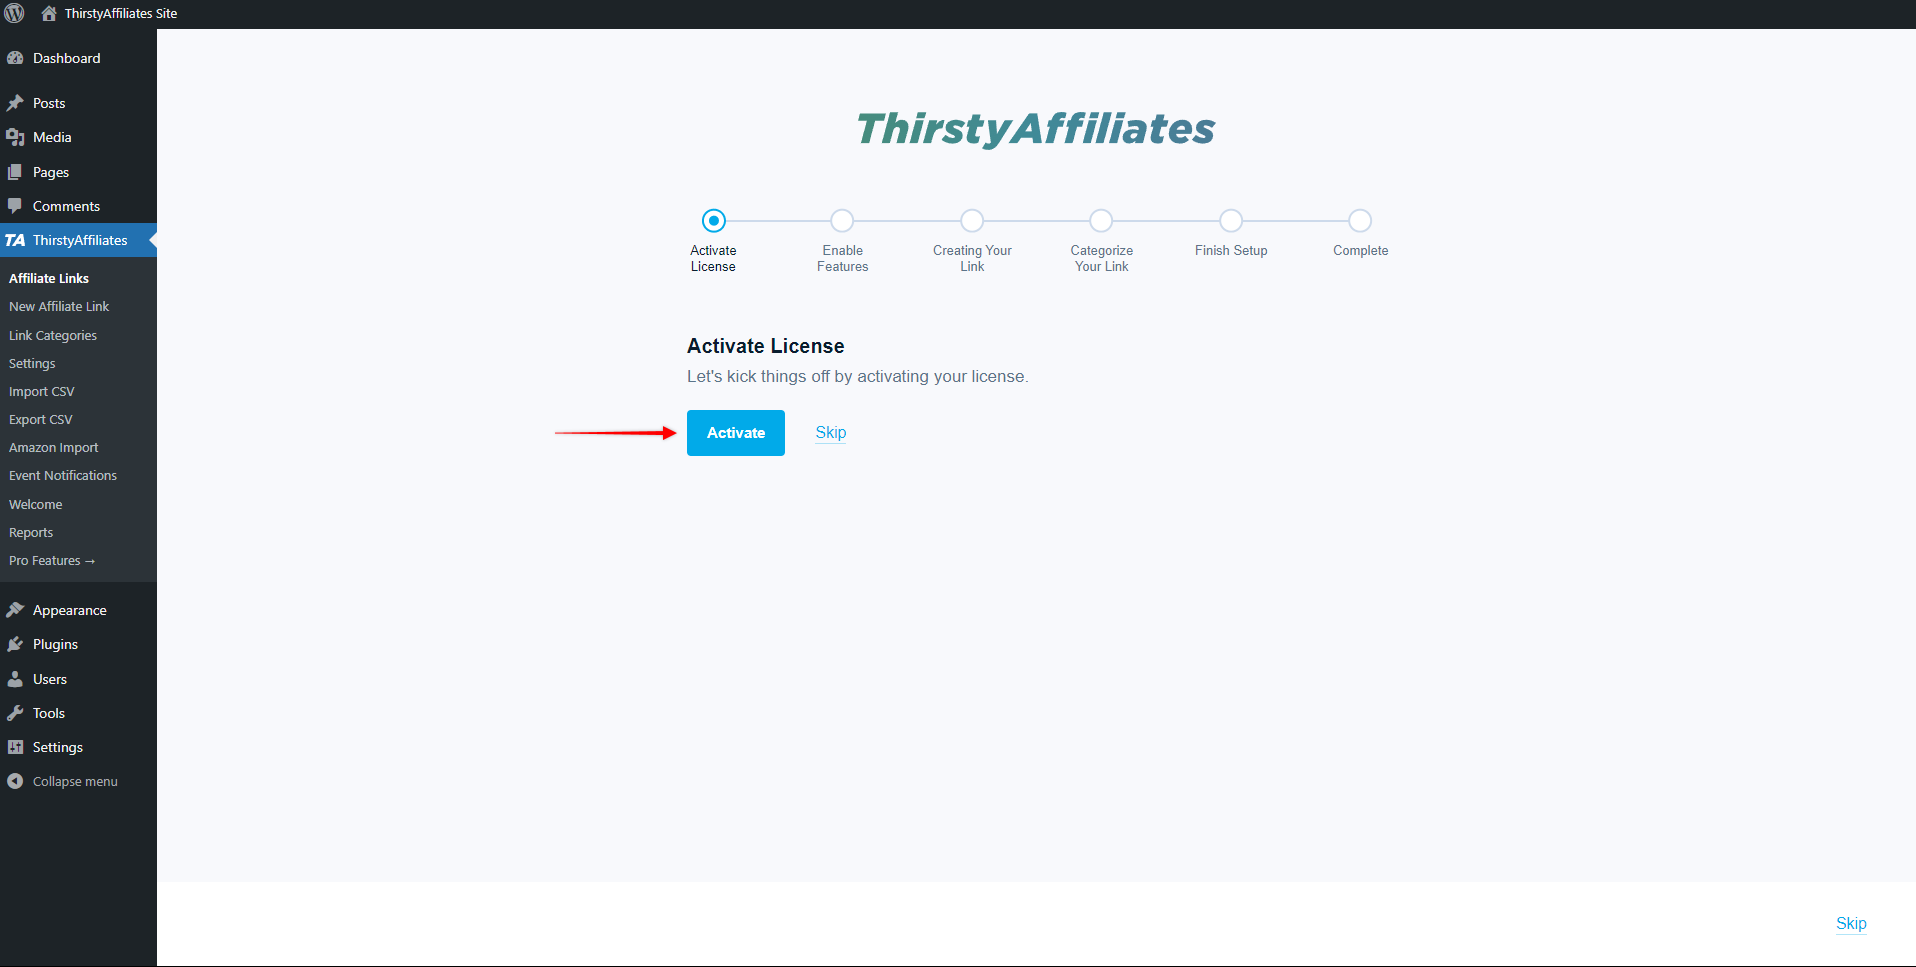
This step is required if you are running the ThirstyAffiliates Pro plugin on your site. To ensure ThirstyAffiliates Pro works perfectly, it needs to be activated. So, the first step is activating your license key.
- Click the Activate button:
%27%20fill-opacity%3D%27.5%27%3E%3Cellipse%20fill%3D%22%233f3f3f%22%20fill-opacity%3D%22.5%22%20rx%3D%221%22%20ry%3D%221%22%20transform%3D%22matrix(-18.66825%201248.0419%20-165.36508%20-2.47354%2059.3%20310.2)%22%2F%3E%3Cellipse%20fill%3D%22%23fff%22%20fill-opacity%3D%22.5%22%20rx%3D%221%22%20ry%3D%221%22%20transform%3D%22rotate(-4.5%209098%20-16390.8)%20scale(980.43101%20406.23428)%22%2F%3E%3Cellipse%20fill%3D%22%23b7b7b7%22%20fill-opacity%3D%22.5%22%20rx%3D%221%22%20ry%3D%221%22%20transform%3D%22matrix(-60.08272%20991.40303%20-93.15373%20-5.64546%20240.8%20325.4)%22%2F%3E%3Cpath%20fill%3D%22%23fff%22%20fill-opacity%3D%22.5%22%20d%3D%22M372.3%20369.7l1573.2-137.6%2069.8%20797.8L442%201167.5z%22%2F%3E%3C%2Fg%3E%3C%2Fsvg%3E)
- This will take you to the next page, prompting you to log into your ThirstyAffiliates account. You will need the credentials used to create your ThirstyAffiliates account when you registered for your ThirstyAffiliates plan.
- Fill in your ThirstyAffiliates account credentials and continue with the login.
ThirstyAffiliates will automatically check for your license key and activate the plugin on your site:
Click Continue.
Enable ThirstyAffiliates Features
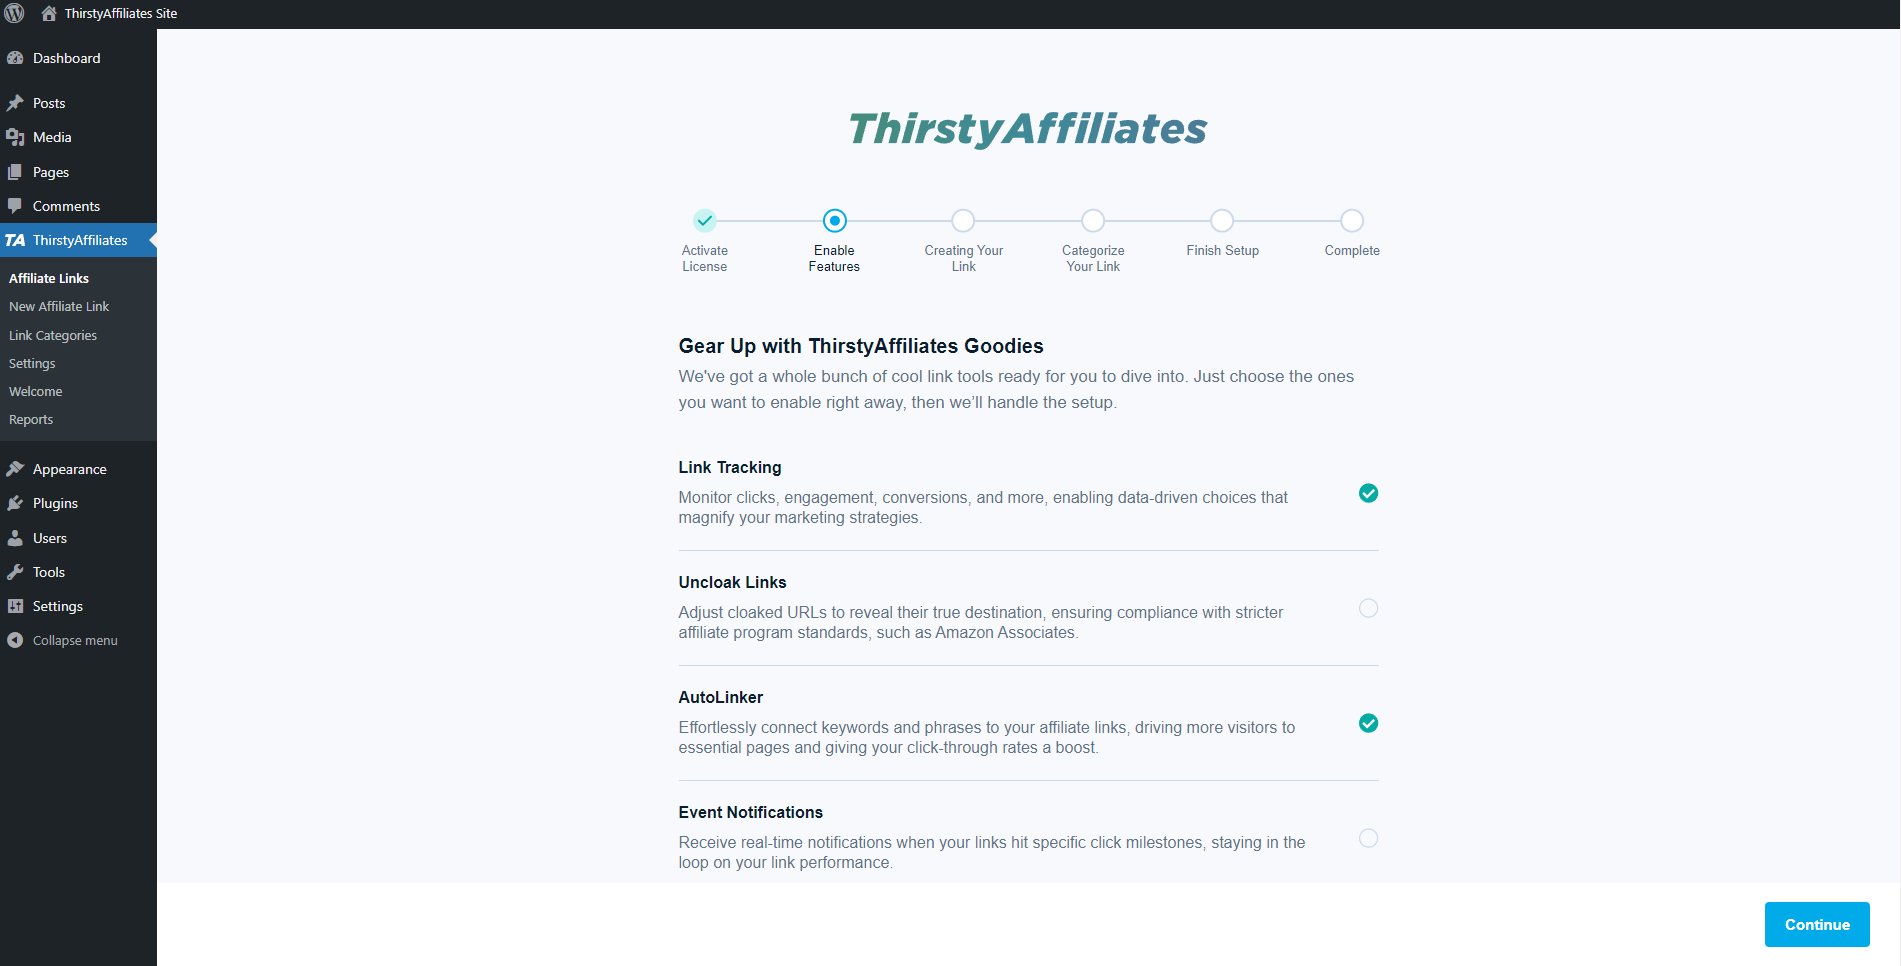
In the second step, you'll select the ThirstyAffiliates features (also known as modules) that you want to activate.
Each module is accompanied by a short description of its features. For instance, enabling the Autolinker module will allow you to automatically link keywords to affiliate links. Similarly, the Link Scheduler module allows for the scheduling of activation and expiration dates for affiliate links.
To enable any feature (module), simply click the check box next to it. Enabling features now will ensure they are activated by the time you complete the setup wizard:

Additionally, you can manage all ThirstyAffilaites modules by going to Dashboard > ThirstyAffiliates > Settings > Modules. Here, you can enable or disable any module on this page, including the ones you enabled in this wizard step.
Click Continue.
Create Your First Link
ThirstyAffiliates is designed to cloak affiliate links, track their performance, and manage them on your WordPress site.
When you create a link with ThirstyAffiliates, it generates a cleaner, user-friendly version of an affiliate link. When the link is clicked, it will redirect users to the original affiliate link.
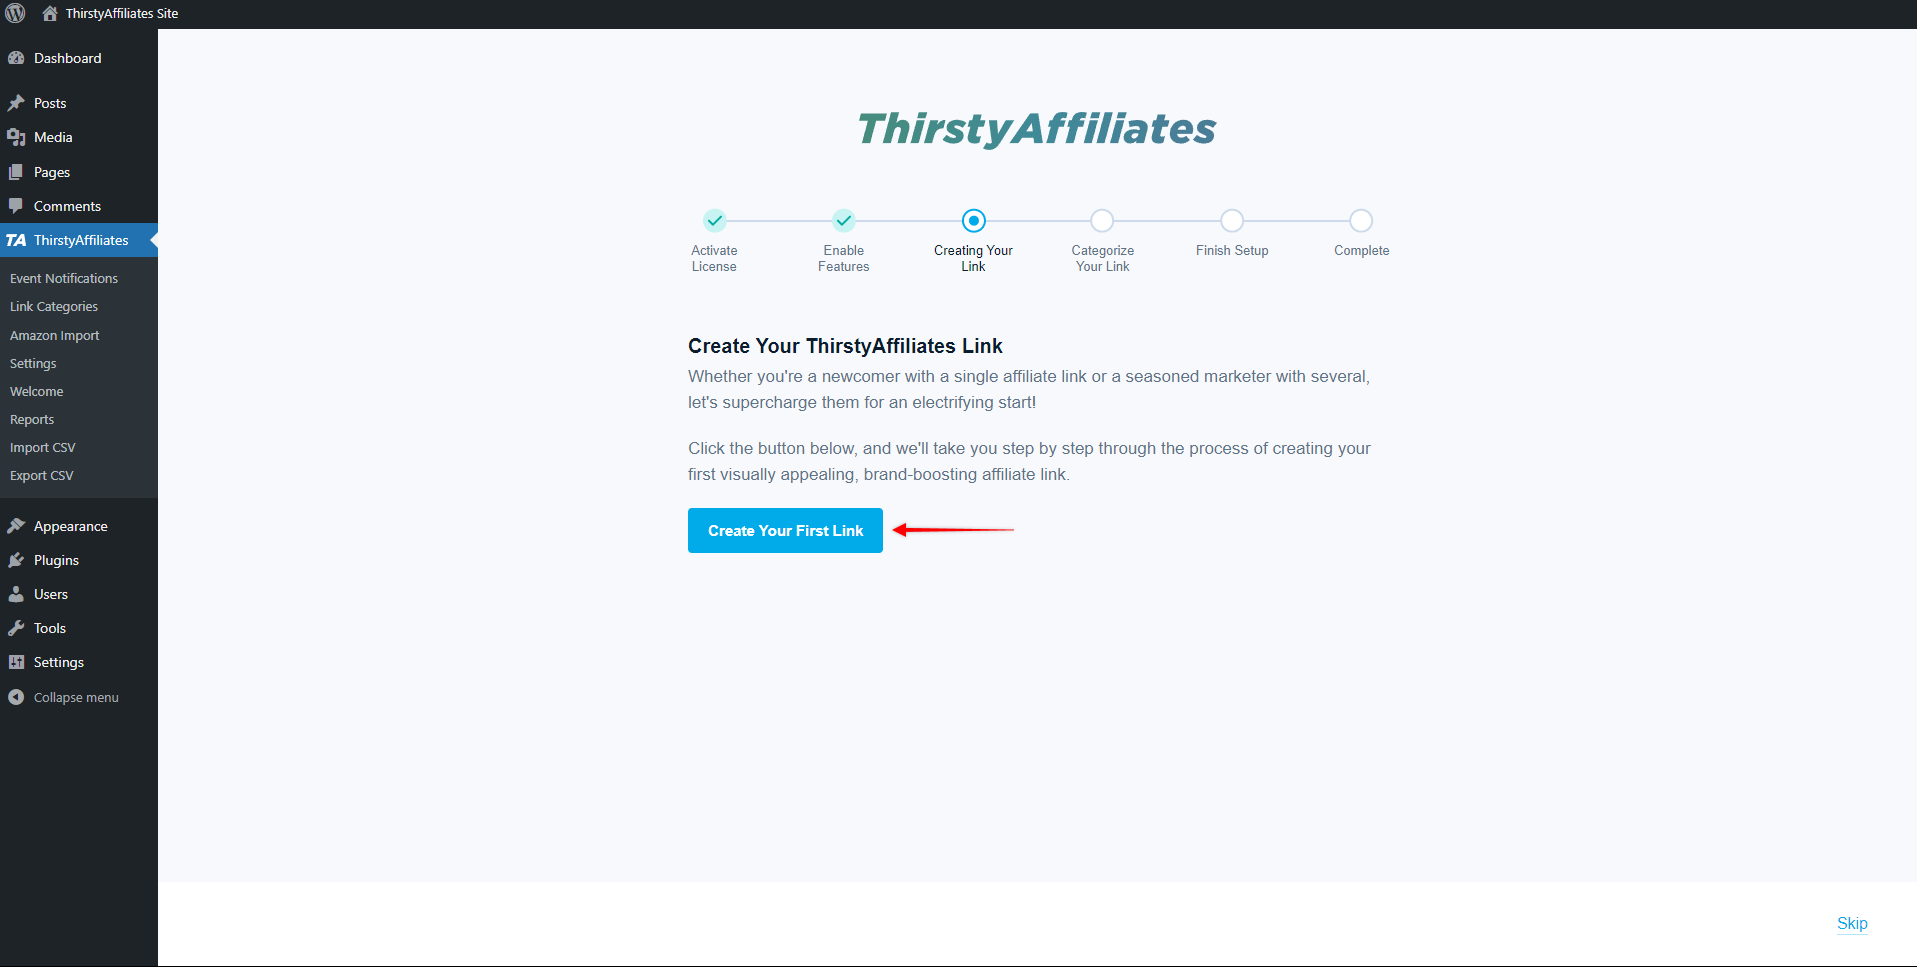
- Click the Create Your First Link button:
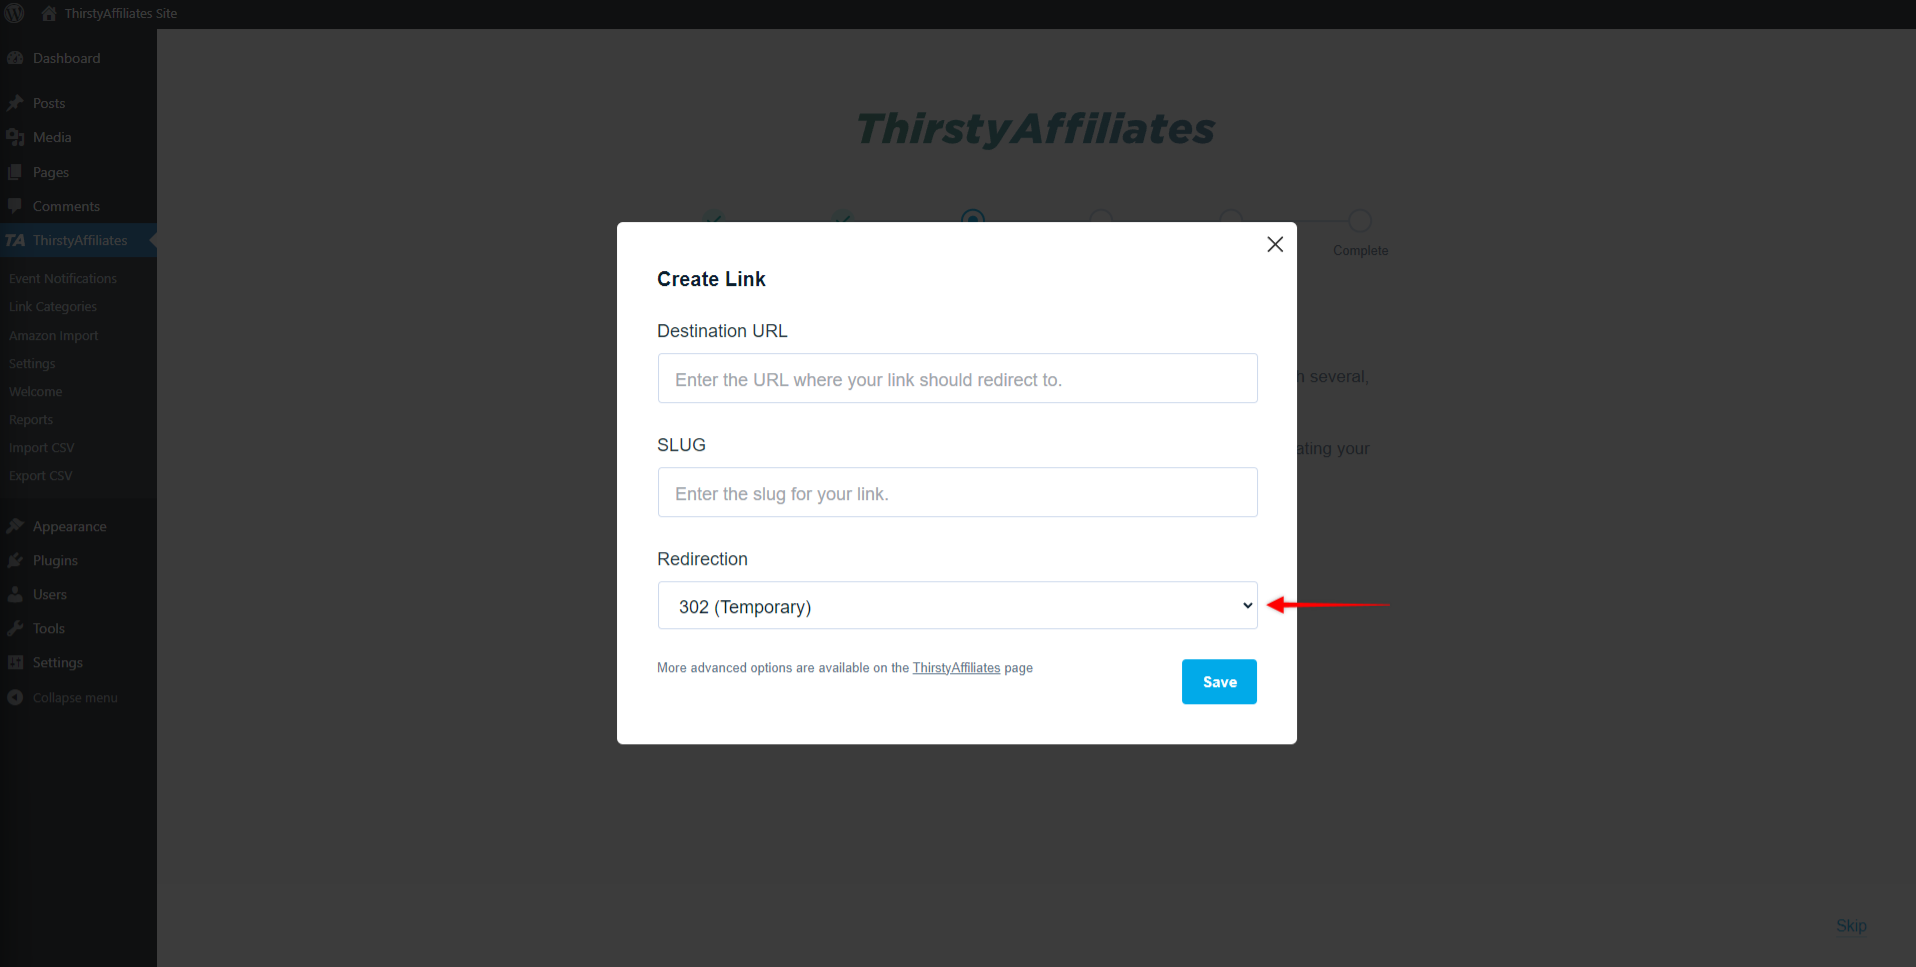
- In the popup, you should input the essential information to create a link. Start by adding the original affiliate link URL in the Destination URL field. This is the target link that users will be redirected to by your ThirstyAffiliates link.
%27%20fill-opacity%3D%27.5%27%3E%3Cellipse%20fill%3D%22%233e3e3e%22%20fill-opacity%3D%22.5%22%20rx%3D%221%22%20ry%3D%221%22%20transform%3D%22matrix(-61.1951%201224.01159%20-152.062%20-7.60242%2062.4%20619.3)%22%2F%3E%3Cellipse%20fill%3D%22%23fff%22%20fill-opacity%3D%22.5%22%20rx%3D%221%22%20ry%3D%221%22%20transform%3D%22matrix(-54.33652%20-418.36802%201008.8793%20-131.03054%201370.2%20696)%22%2F%3E%3Cellipse%20fill%3D%22%23b3b3b3%22%20fill-opacity%3D%22.5%22%20rx%3D%221%22%20ry%3D%221%22%20transform%3D%22matrix(-95.2714%20-3.8265%2037.74663%20-939.80912%20227%20225.4)%22%2F%3E%3Cellipse%20fill%3D%22%23fff%22%20fill-opacity%3D%22.5%22%20rx%3D%221%22%20ry%3D%221%22%20transform%3D%22rotate(-10.6%204645.4%20-7459.3)%20scale(1084.40607%20446.23856)%22%2F%3E%3C%2Fg%3E%3C%2Fsvg%3E)
- Next, create a user-friendly version of the link by typing in a customized Slug:
%27%20fill-opacity%3D%27.5%27%3E%3Cellipse%20fill%3D%22%23fff%22%20fill-opacity%3D%22.5%22%20rx%3D%221%22%20ry%3D%221%22%20transform%3D%22matrix(360.29647%2011.95226%20-9.49765%20286.30289%20944%20460)%22%2F%3E%3Cellipse%20fill-opacity%3D%22.5%22%20rx%3D%221%22%20ry%3D%221%22%20transform%3D%22rotate(87.2%20-165.7%20294)%20scale(1466.73169%20268.4229)%22%2F%3E%3Cellipse%20fill%3D%22%23272727%22%20fill-opacity%3D%22.5%22%20rx%3D%221%22%20ry%3D%221%22%20transform%3D%22matrix(296.82686%2017.52733%20-107.16514%201814.85085%201694%20683)%22%2F%3E%3Cellipse%20fill%3D%22%23b0b0b0%22%20fill-opacity%3D%22.5%22%20rx%3D%221%22%20ry%3D%221%22%20transform%3D%22matrix(-434.83659%2010.62718%20-8.62956%20-353.09927%20921.8%20457.5)%22%2F%3E%3C%2Fg%3E%3C%2Fsvg%3E)
- Finally, you need to specify what type of Redirection this link should be. You can set it as 301 (Permanent), 302 (Temporary), or 307 (Temporary) redirect. If you’re not sure which redirection you should use, you can find out more about redirection types here.
Click Save, then Continue.
Note: The Wizard will create a new link with only basic settings. You can find additional link options at Dashboard > ThirstyAffiliates > Affiliate Links.
Categorize Your Link
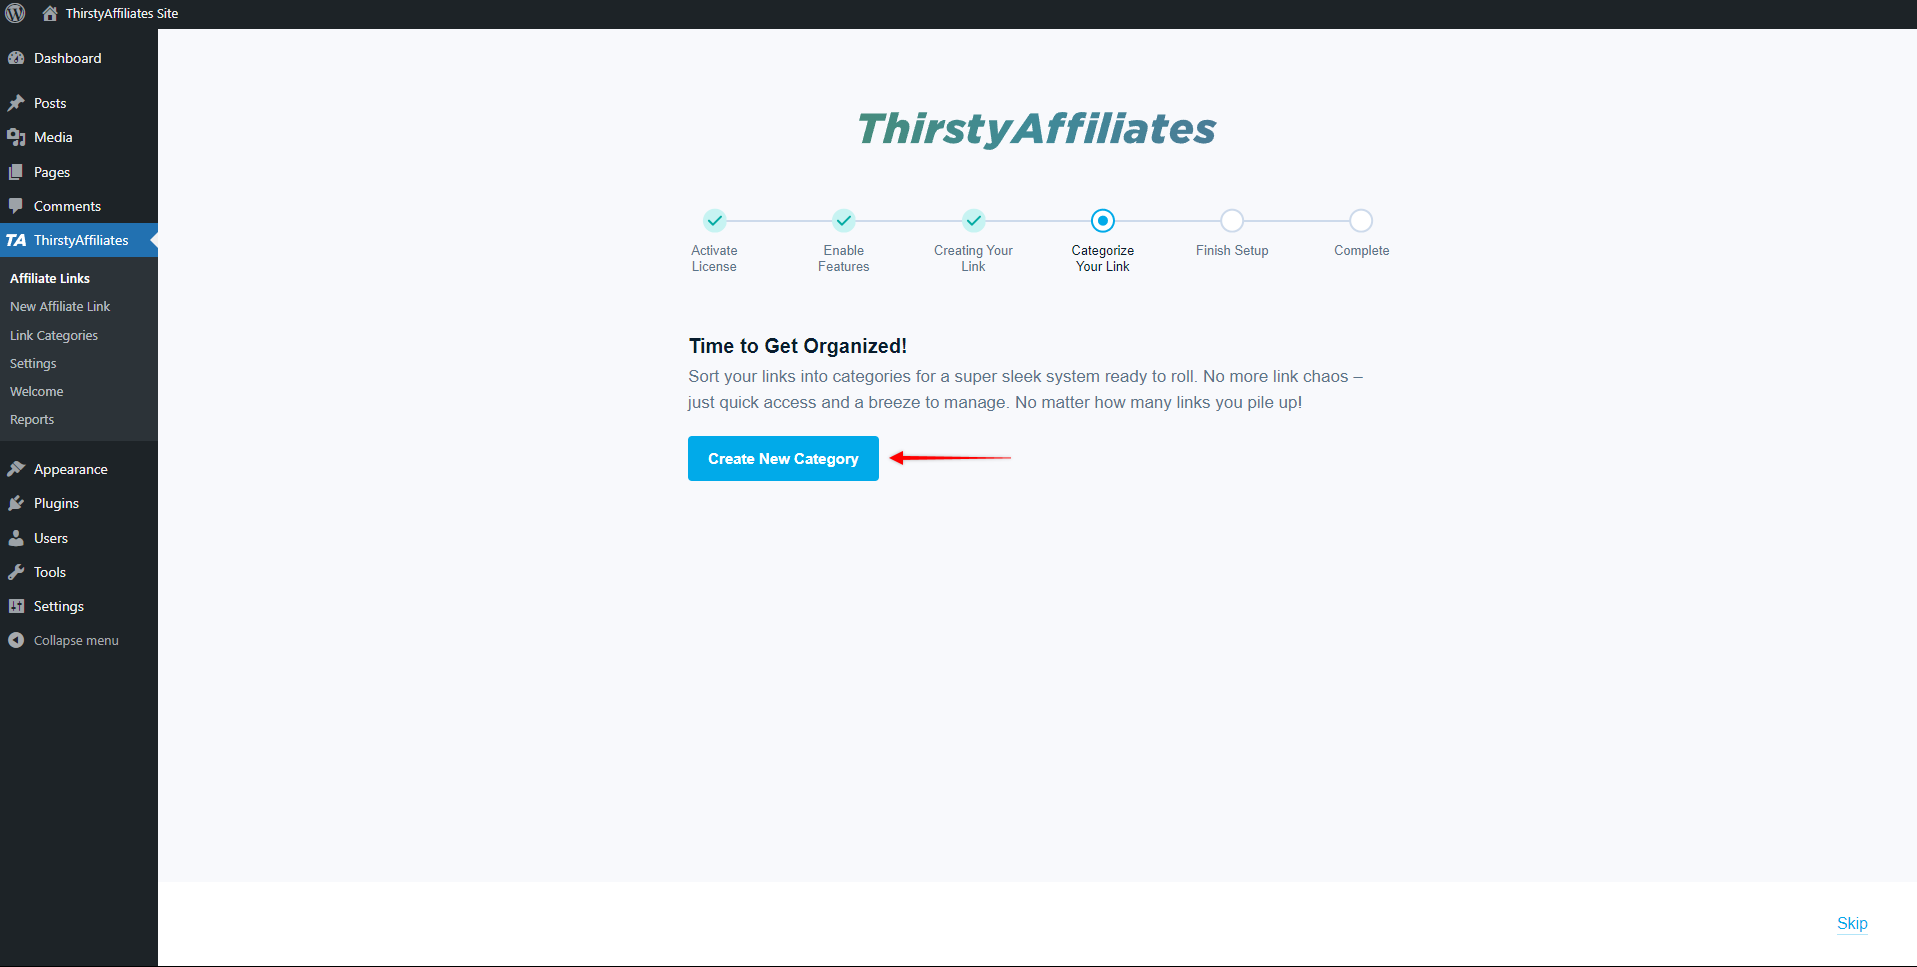
Link Categories are used to help organize your ThirstyAffiliates links. By grouping links into categories, you not only streamline your workflow but also enhance reporting efficiency.
Instead of sifting through individual links, you can use categories as a search filter in reports, making it easier to analyze and manage your affiliate links.
Click the Create New Category button:
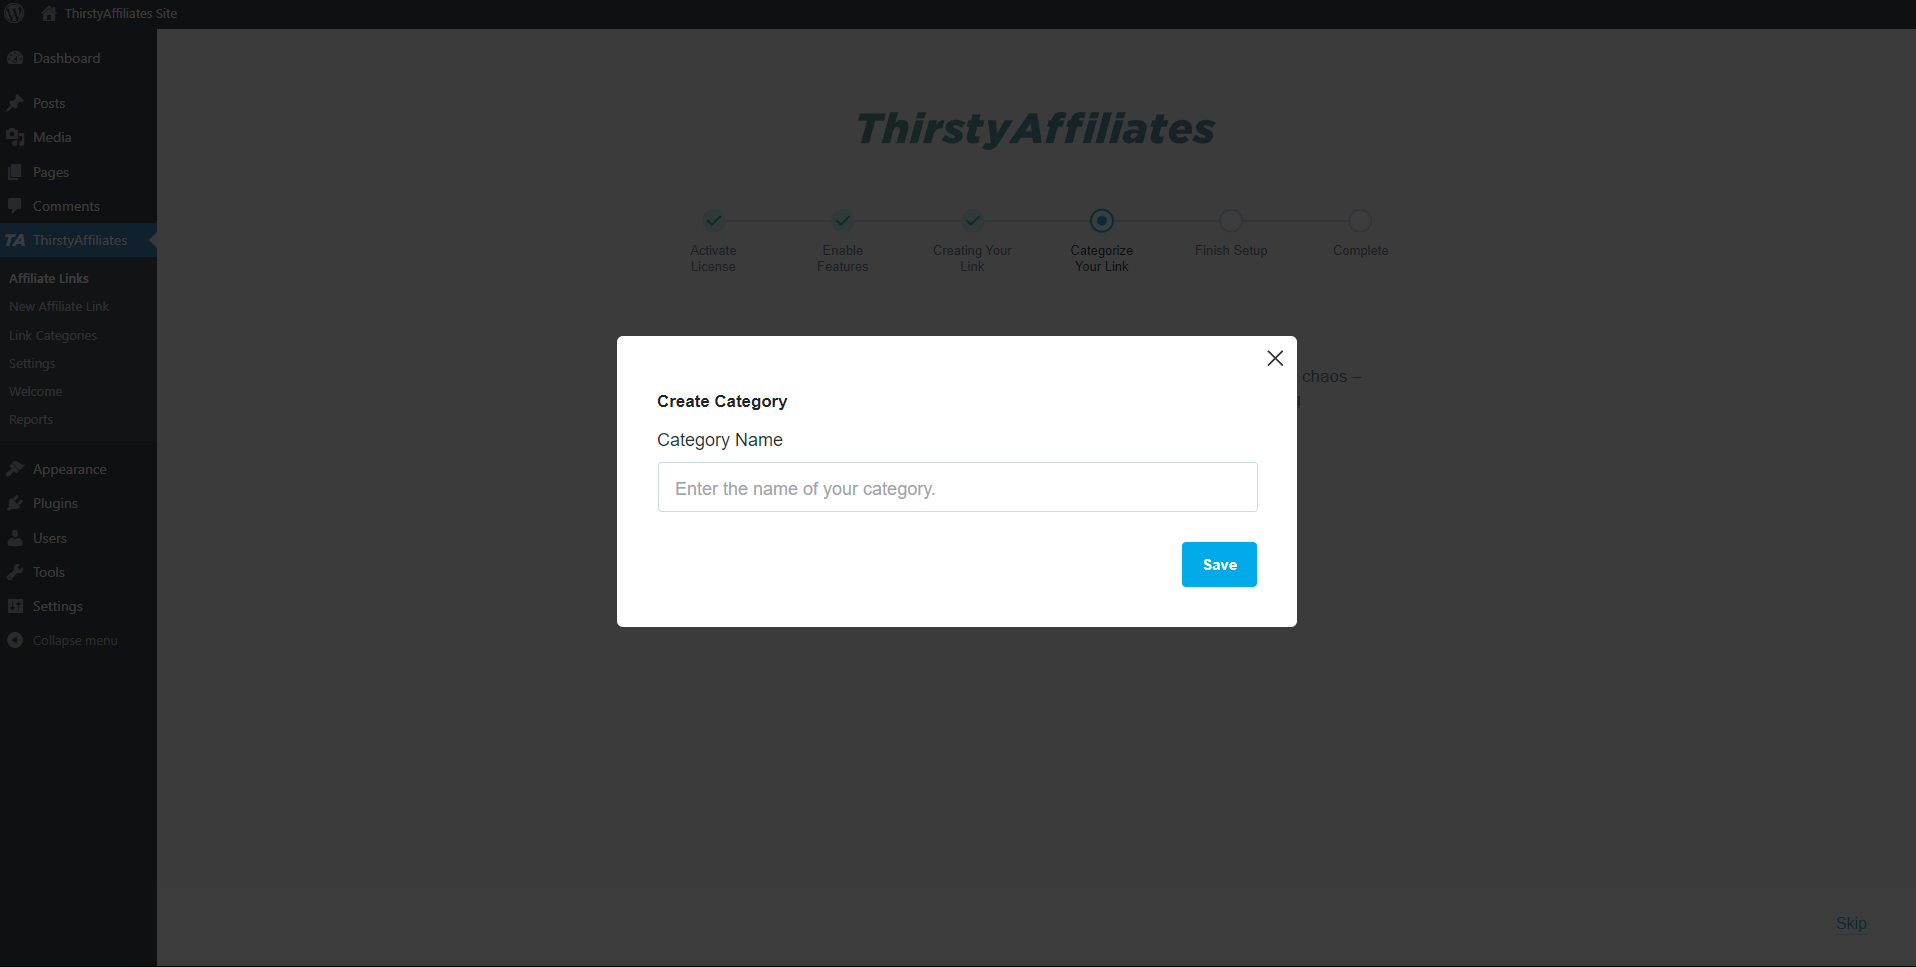
This will open a popup where you can name your first category. The link you previously created will be assigned to this category:
Click Save.
Complete Setup
After completing the setup, you'll see your newly created affiliate link along with your first category. You can now insert your affiliate link anywhere across your website.
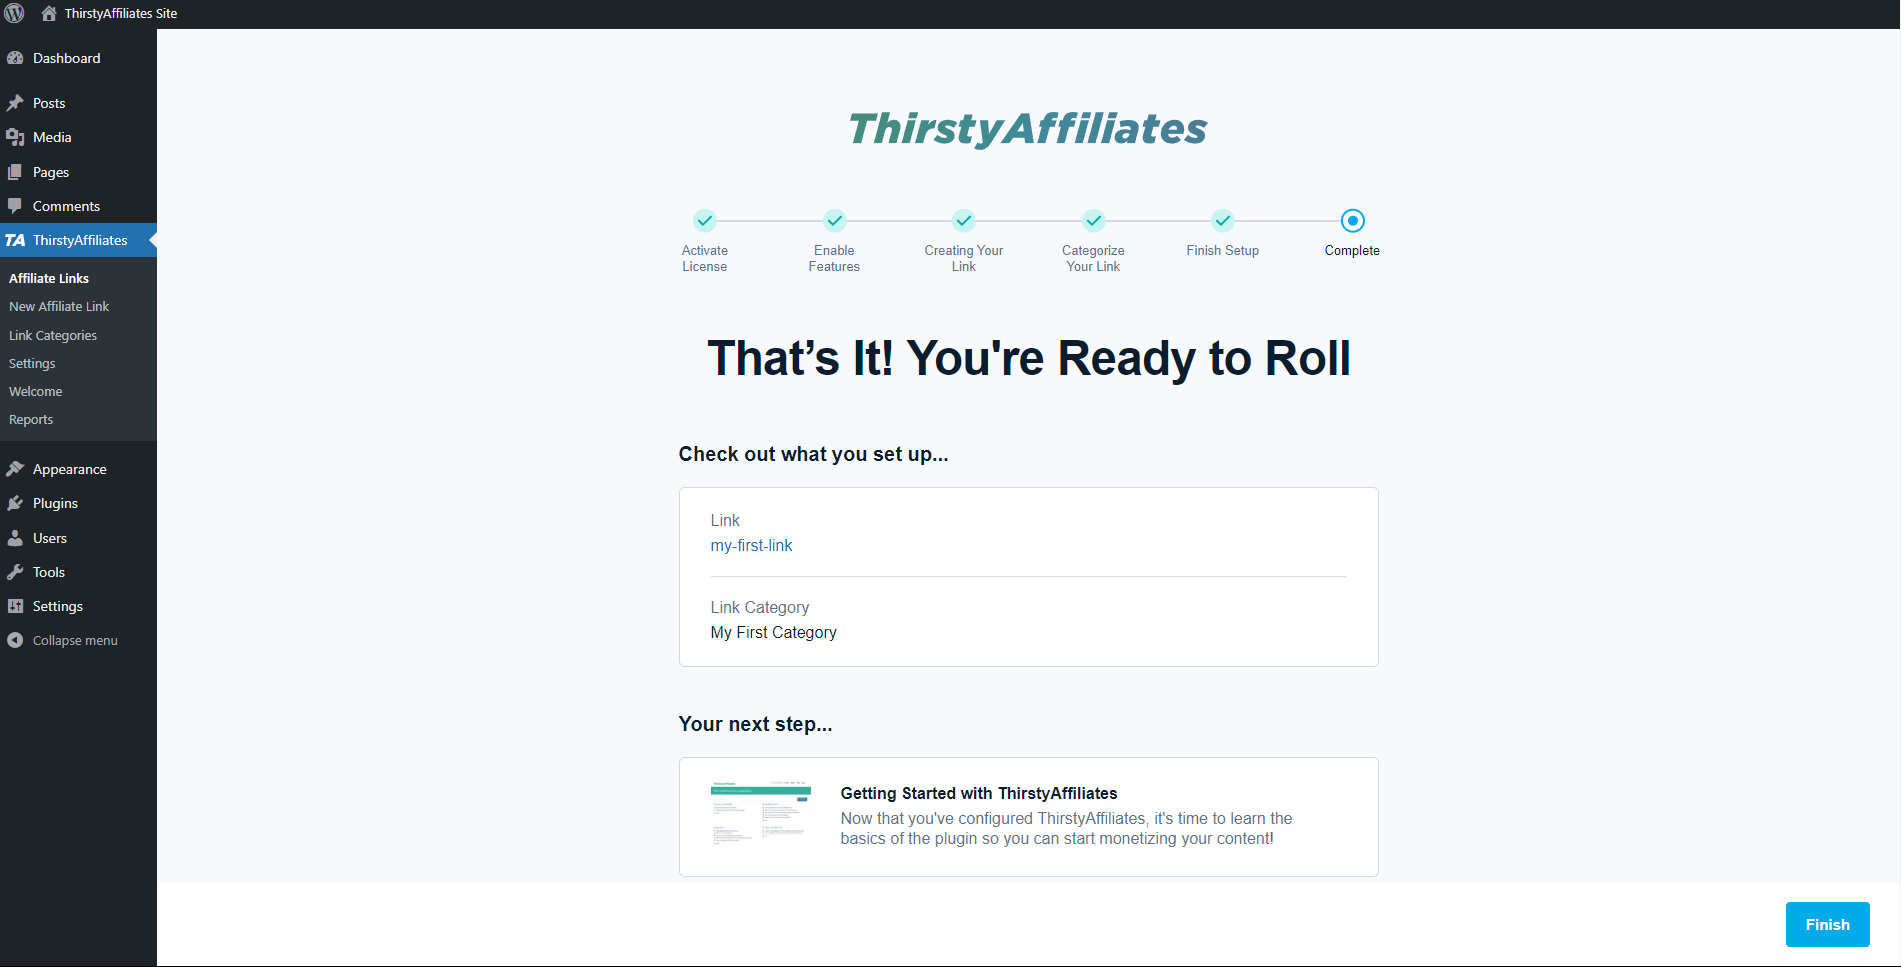
You can find this link and all your future ThirstyAffiliates links by going to the Dashboard > ThirstyAffiliates > Affiliate Links.
What’s Next?
The wizard will cover the basics. It will help you set your first link and category.
Next, you should create ThirstyAffiliates links for other affiliate links on the site, and add them to your content. Also, depending on the modules you have enabled, there will be additional advanced options available for each link.
In addition, you can also configure advanced plugin options, by navigating to Dashboard > ThirstyAffiliates > Settings.
Once done, you will be able to track your links using reports. All reports are available at Dashboard > ThirstyAffiliates > Reports.

