Contents

You see product comparison tables everywhere when you’re shopping online. Whether it’s an eCommerce site or a blog, comparison tables help you understand what different products offer. They also help you make more informed purchasing decisions.
If you’re running an affiliate blog, you especially understand the importance of product comparison tables. With these tables, you can compare the different products on your page and get more affiliate commissions.
Creating a table to attractively compare products is quite simple and doesn’t take a whole lot of time. But it's important that the comparison table you create is engaging to the reader. Your comparison table should inspire the user to take action – whether it’s to purchase a product or just click on the purchase link.
In this article, we'll show you how to create an awesome product comparison table in WordPress. Let’s get started!
How to Create a Product Comparison Table Using WP Table Builder
We’ll be creating the following example table in this tutorial:

Though relatively bare-bones for our purposes, this table has every element that comparison tables usually have. We'll explain each section in detail to help you create the exact table as shown above.
The first step in this tutorial begins with installing a plugin.
Step #1: Install WP Table Builder Plugin
We’ll be using the WP Table Builder Plugin. It’s a free drag-and-drop table builder. This builder is perfect for creating comparison tables and has a lot of options for customization, including the following elements:
- Text
- Image
- Button
- Star Rating
- List
To install the plugin, go to your WordPress dashboard > Plugins. Click on Add New, and search for WP Table Builder. Click install and activate to install the plugin on your website:
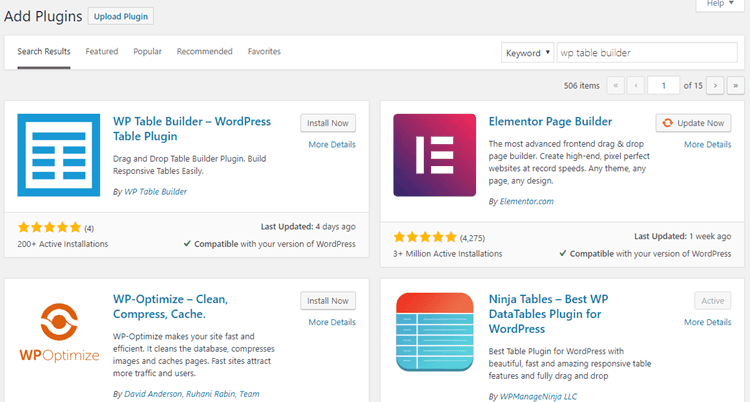
Alternatively, you can download the plugin from the WordPress repository and upload it to your website.
Step #2: Create a New Table
To create a new table in the WP Table Builder Plugin, first go to Table Builder > Add New.

You’ll see the table drag-and-drop builder as shown below:
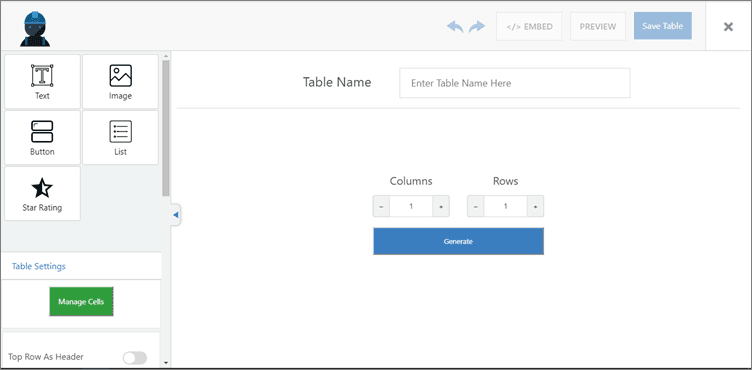
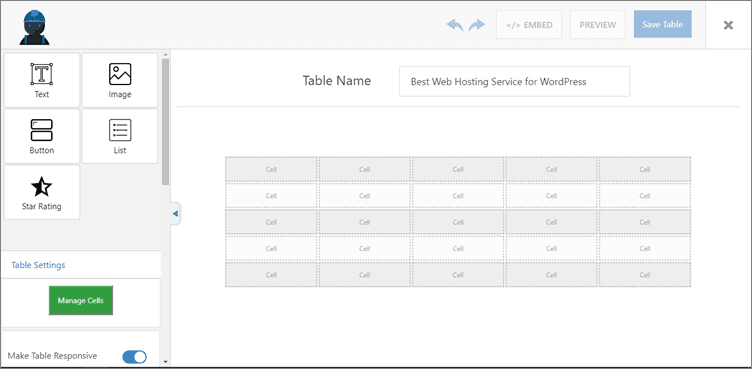
You can give a name to your table and set the number of rows and columns. Once you do that, click on the generate button. This will generate your table as shown below:
Step #3: Add Content to Your Table
Now it's time to add content to your table. WP Table Builder lets you drag and drop elements to the cells of your table. You can select the elements from the left sidebar and drag them to your table. Here’s how our table looks after adding content:

We've used just the text, image, and button elements to create the table. As you can see, it looks clean and beautiful.
Now we're going to show you how you can make your table even more attractive using this plugin.
Step #4: Make Your Table Beautiful and Responsive
There are many ways you can make your table look gorgeous in WP Table Builder. This plugin also has tons of customization options to help you make your table more engaging. Let's get started.
Configure Table Border
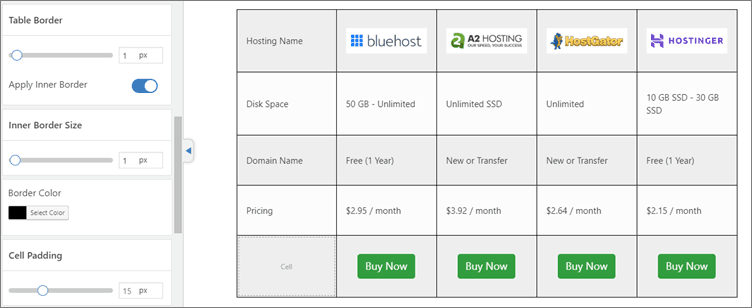
WP Table Builder lets you add a border to your table. You can find this option in the table settings on the left. You can set the border size, change its color, and also apply an inner border to your table:
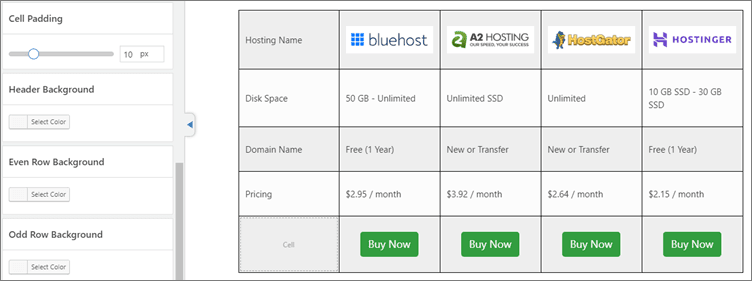
Cell Padding
The cell padding option changes the padding of each cell of your table:
Header Background
You can also customize the background color of the header of your table to add a bit more style:
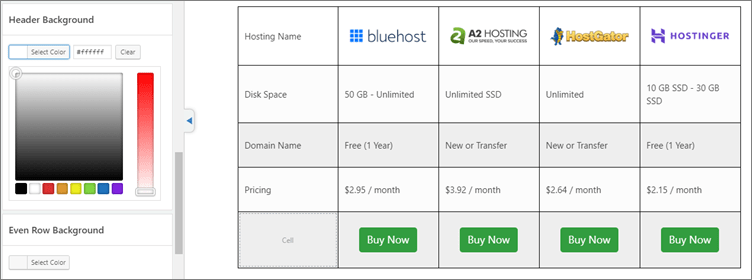
For this table, I’ve set the header background to white so that the logos blend well.
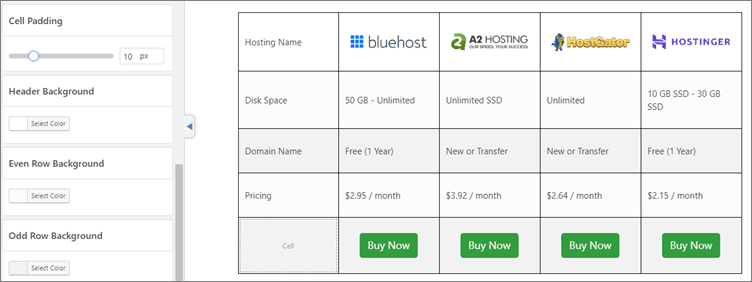
Even/Odd Row Background
Alternate colors for rows are very popular in product comparison tables, and you can apply this easily with the WP Table Builder plugin:
Now that your table looks beautiful on a desktop view, you also want to make sure it looks great on mobile devices.
The awesome thing is, you don’t have to worry about doing a lot of leg work. All you need to do is to click on the Make Table Responsive toggle. This will make your table look attractive and engaging on mobile devices:
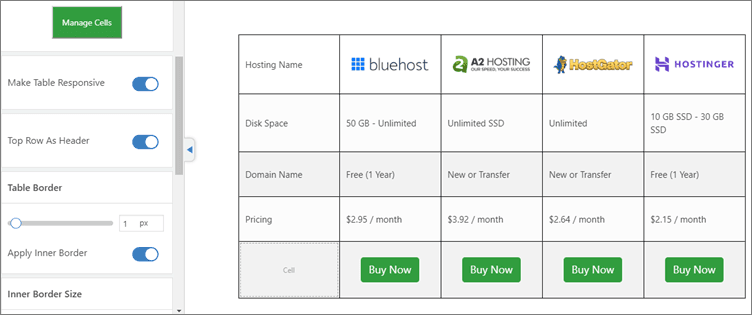
Lastly, enable the Top Row As Header option to set your top row as the header of the table.
At last, your table is ready to go!
Step #5: Insert the Table via Shortcode
Now that your table is ready, you need to insert it into your content. You can do this easily by inserting the plugin shortcode.
To find the table's shortcode, click on the Embed button at the top of the table builder. This will open a popup featuring the shortcode:
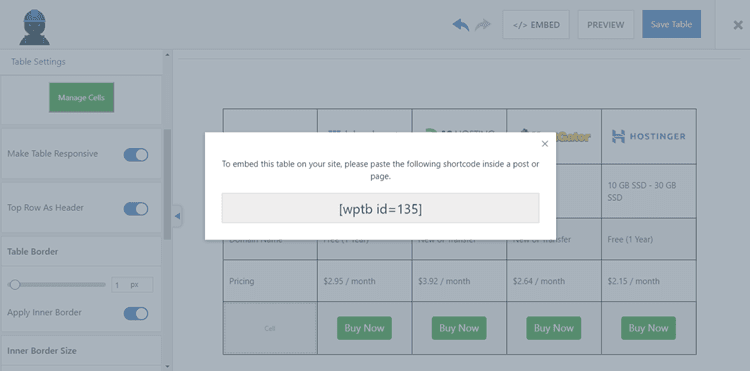
Now, you can copy and paste this shortcode anywhere in your content.
Another way to find the shortcode of the table is to go to Table Builder > All Tables. Here, you’ll find all the tables you have created:

As you can see, you can copy the table's shortcode right from this page.
Conclusion
Before, if you were wondering how to create a product comparison table in WordPress, hopefully now you see how easy the process is. With the WP Table Builder plugin, the whole process of creating an engaging table is simplified and can be done in minutes.
There are many customization options that let you design the look and feel of the table you’re creating.
If you have any questions about this tutorial, please ask them in the comments section below. We're happy to help!
If you liked this post, be sure to follow us on Twitter, Instagram, Facebook, Pinterest, and LinkedIn! And don't forget to subscribe in the box below.


awesome tutorial about make beautiful product comparison table in wordpress. we have bookmarked this article and will try the tutorial soon.
Thank you very much, for this informative article. I have understood with a single go of this article. This article cleared the concept in such a way that, I didn’t require any other guide.
Keep Publishing such a informative article.